开始这篇文章之前,我们先来认识下WordPress自3.8+以后引入的一套全新的字体图标 Dashicons。
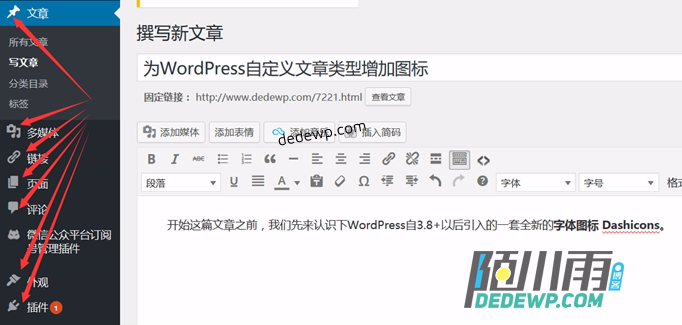
上图中箭头所指的就是今天陌小雨要给大家浓墨重彩介绍的字体图标 Dashicons。
以添加自定义公告为例:
我们只需要添加下面代码到新建php文件中引用即可创建一个公告:
<?php
function post_type_bulletin() {
register_post_type(
    'bulletin',
    array( 'public' => true,
        'publicly_queryable' => true,
        'hierarchical' => false,
        'labels'=>array(
            'name' => _x('公告', 'post type general name'),
            'singular_name' => _x('公告', 'post type singular name'),
            'add_new' => _x('添加新公告', '公告'),
            'add_new_item' => __('添加新公告'),
            'edit_item' => __('编辑公告'),
            'new_item' => __('新的公告'),
            'view_item' => __('预览公告'),
            'search_items' => __('搜索公告'),
            'not_found' =>  __('您还没有发布公告'),
            'not_found_in_trash' => __('回收站中没有公告'),
            'parent_item_colon' => ''
            ),
         'show_ui' => true,
         'menu_position'=>5,
            'supports' => array(
            'title',
            'author',
            'excerpt',
            'thumbnail',
            'trackbacks',
            'editor',
            'comments',
            'custom-fields',
            'revisions' ) ,
        'show_in_nav_menus' => true ,
		'menu_icon' => 'dashicons-megaphone',
        'taxonomies' => array(
            'menutype',
            'post_tag')
            )
    );
}
add_action('init', 'post_type_bulletin');

function create_genre_taxonomy() {
  $labels = array(
         'name' => _x( '公告分类', 'taxonomy general name' ),
         'singular_name' => _x( 'genre', 'taxonomy singular name' ),
         'search_items' =>  __( '搜索分类' ),
         'all_items' => __( '全部分类' ),
         'parent_item' => __( '父级分类目录' ),
         'parent_item_colon' => __( '父级分类目录:' ),
         'edit_item' => __( '编辑公告分类' ),
         'update_item' => __( '更新' ),
         'add_new_item' => __( '添加新公告分类' ),
         'new_item_name' => __( 'New Genre Name' ),
  );
  register_taxonomy('genre',array('bulletin'), array(
         'hierarchical' => true,
         'labels' => $labels,
         'show_ui' => true,
         'query_var' => true,
         'rewrite' => array( 'slug' => 'genre' ),
  ));
}
add_action( 'init', 'create_genre_taxonomy', 0 );
>
上述代码中的
'menu_icon' => 'dashicons-megaphone',
就是我们设定的Dashicons图标,效果如下图。如果去掉这行的话,图标默认和文章的图标一样。

想获取其他的Dashicons图标?点击前往→Dashicons 主页

好了教程结束,其实不设置这个也没啥关系,只是陌小雨有一些强迫症,觉得公告的那个图标和文章的图标如果一样,看着很不爽,这样陌小雨觉得眼前都亮了。
2016-5-11补充更新
为了让这篇文章成为一个完整的教程,陌小雨还是说下怎么调用上文自定义的公告文章类型吧:
<div id="site-gonggao">
<div class="site-gonggao-div"><i class="fa fa-volume-up"></i> </div>
<div id="site-gonggao-div2" class="sitediv">
<ul class="list" id="siteul">
<?php $loop = new WP_Query( array( 'post_type' => 'bulletin', 'posts_per_page' => 5 ) );
while ( $loop->have_posts() ) : $loop->the_post();
>
<li><?php mb_strimwidth(the_content(), 0, 70, '…'); ?></li>
<?php endwhile; wp_reset_query(); ?>
</ul>
</div>
</div>
其中的”5″为调用显示条数,”70″为调出内容的字符数,这两个参数可根据自己的情况设置。
css分享
div#site-gonggao{line-height: 25px; height: 30px; background-color: #FFF; width: 990px; margin: 0 auto 10px; padding-left: 10px; color: #666; border-left: 5px solid #3E94D2; border-right: 5px solid #3E94D2; -webkit-box-shadow: 0 5px 5px #D3D3D3; box-shadow: 0 5px 5px #D3D3D3;}
.site-gonggao-div{float:left;}
.fa-volume-up:before{content: "\f028"; color: #428bca;}
#site-gonggao a{color: #1663B7;}
#site-gonggao a:hover{color: #09F;}
#site-gonggao-div2{overflow: hidden;
height:30px;}
#site-gonggao-div2 .list li{height: 30px;line-height: 30px;overflow: hidden;}
公告前台滚动显示js分享:
function autoScroll(obj){
var aa=document.getElementById("siteul").getElementsByTagName("li").length;
if(aa!==1){
    jQuery(obj).find(".list").animate({
          marginTop : "-30px"
      },500,function(){
      jQuery(this).css({marginTop : "0px"}).find("li:first").appendTo(this);
      })
      };
      }
   $(function(){
       setInterval('autoScroll(".sitediv")',4000)
     })  ;
注:其中,第4行的”.list”是调用代码中,ul标签的class样式;第12行的”.sitediv”是包裹ul的div标签的class样式。